Exploration and Resources

X-radiograph, Peter Paul Rubens,The Fall of Phaeton, detail of the lower right

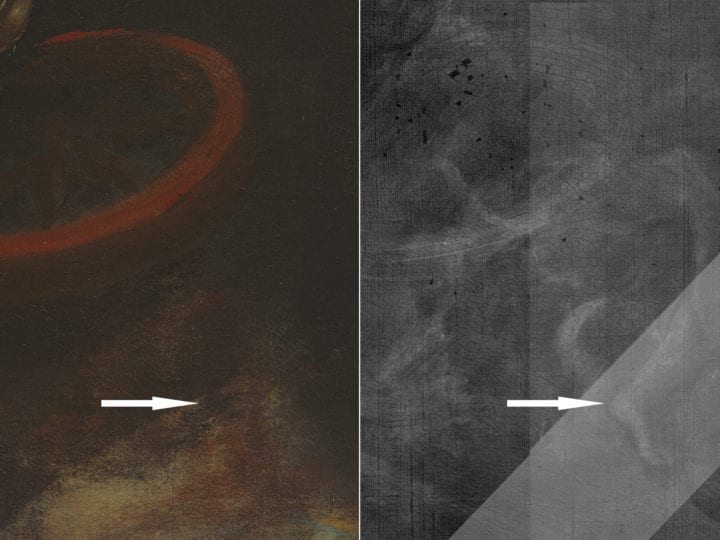
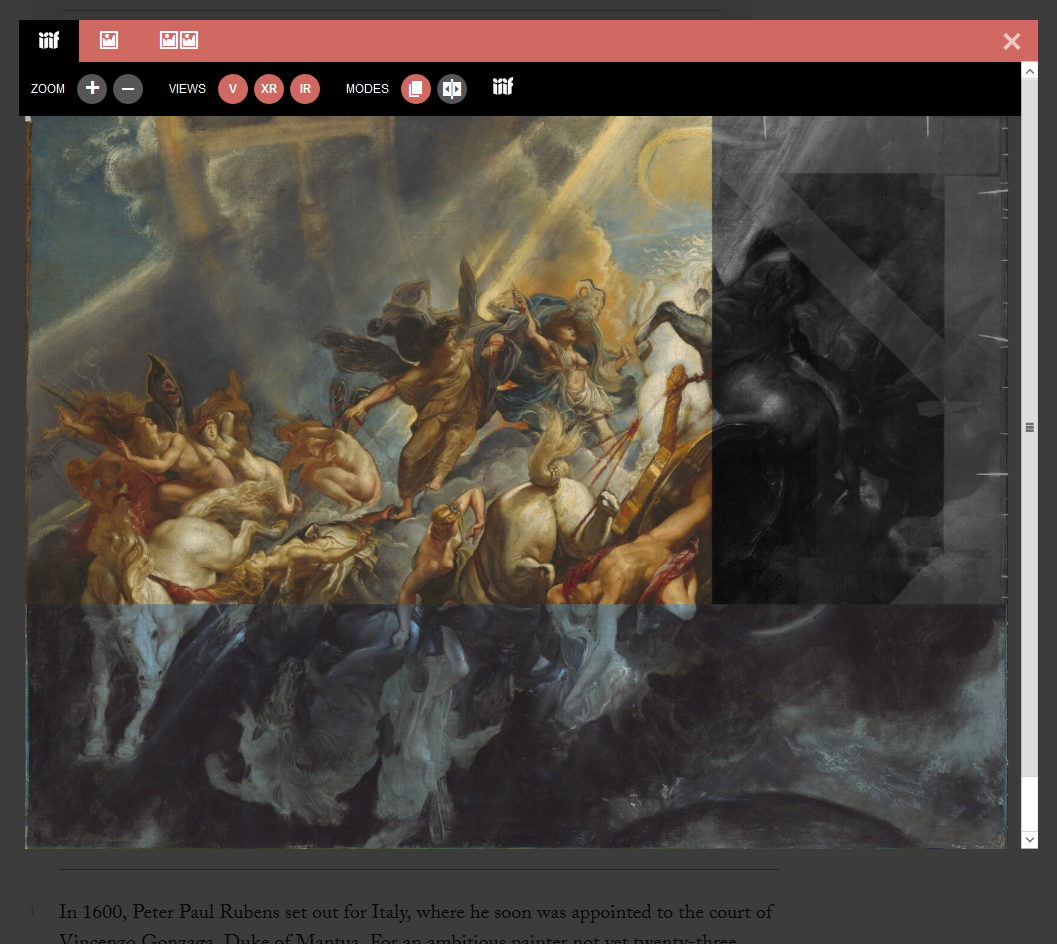
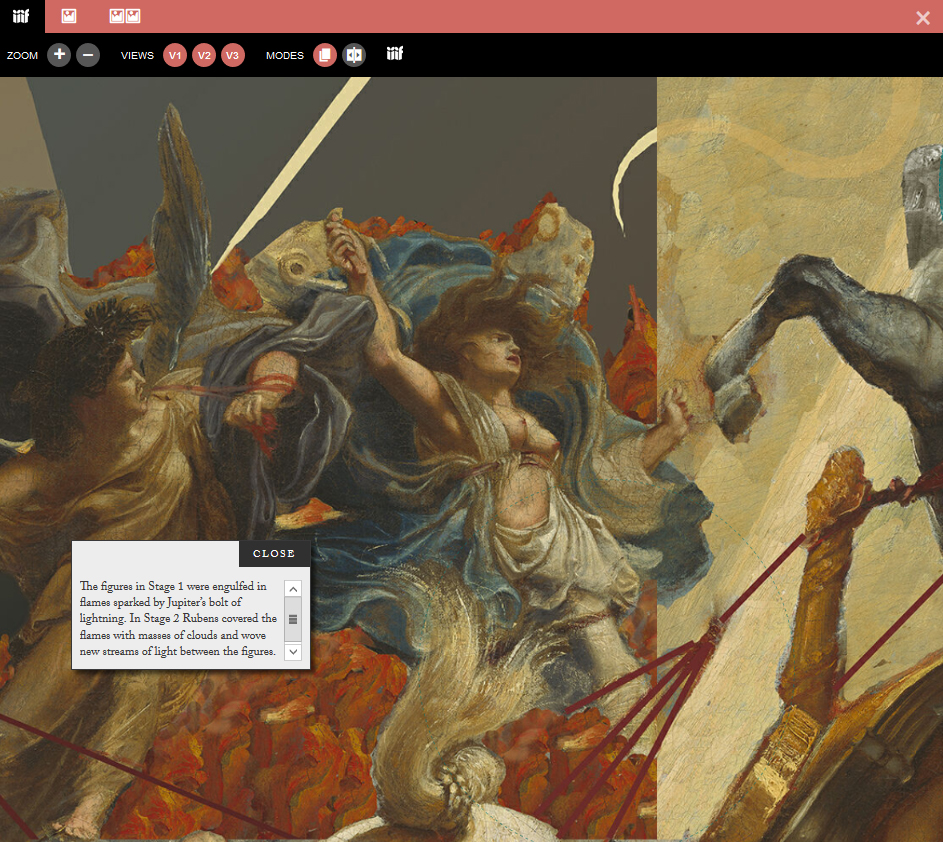
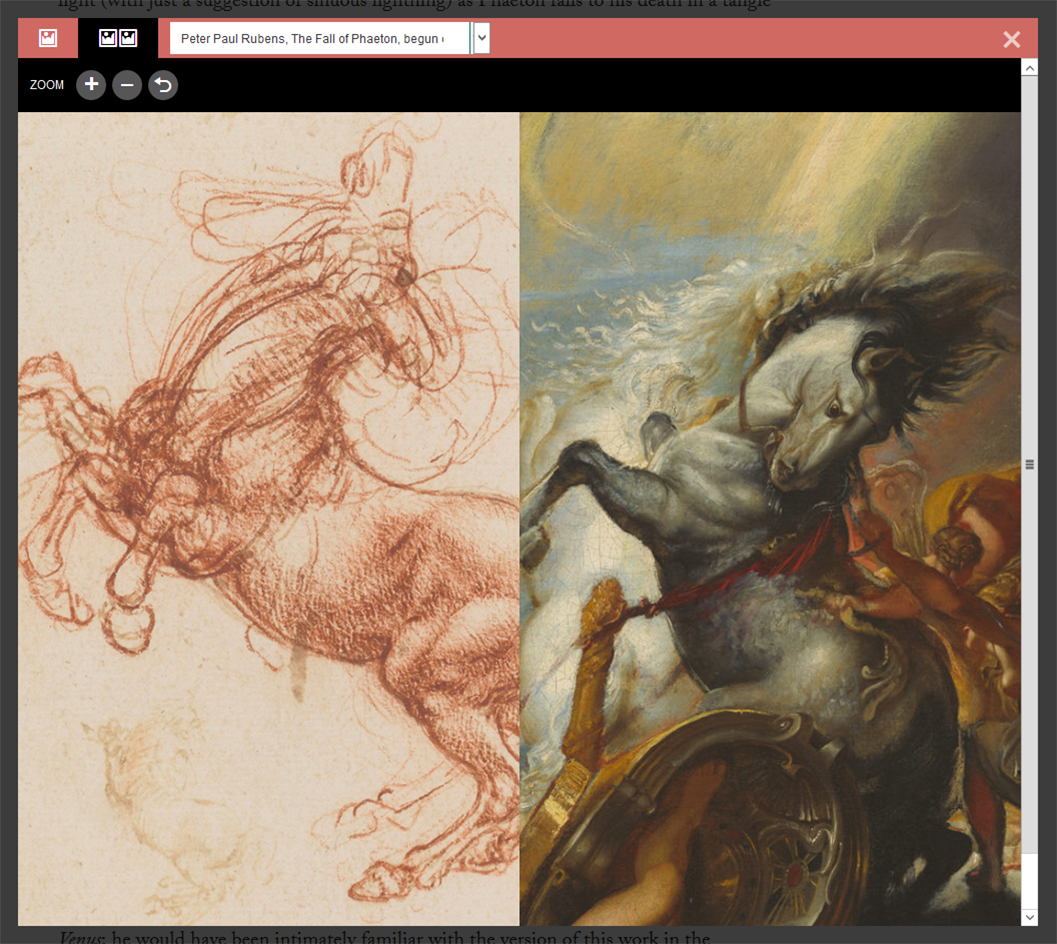
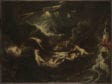
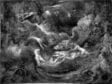
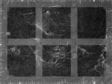
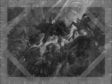
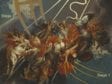
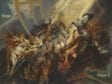
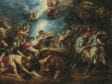
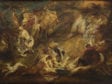
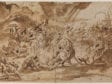
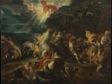
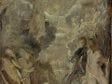
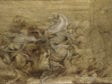
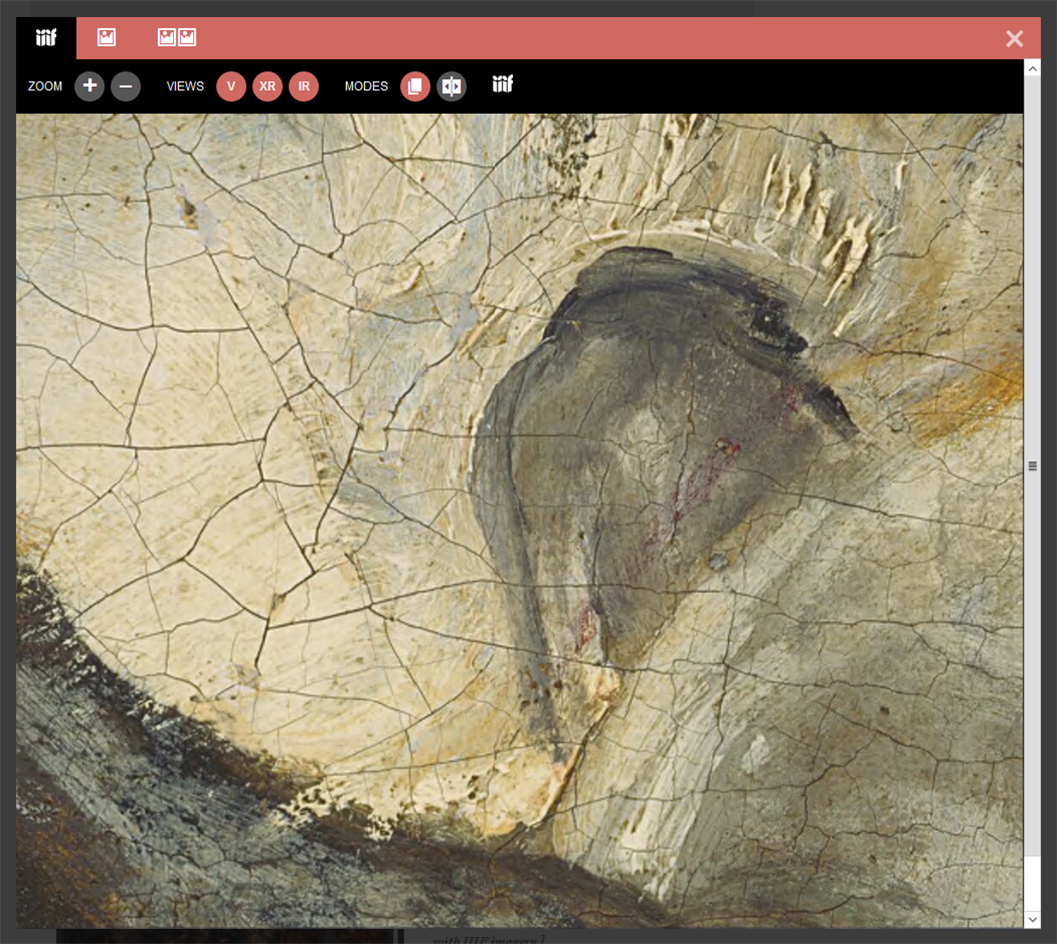
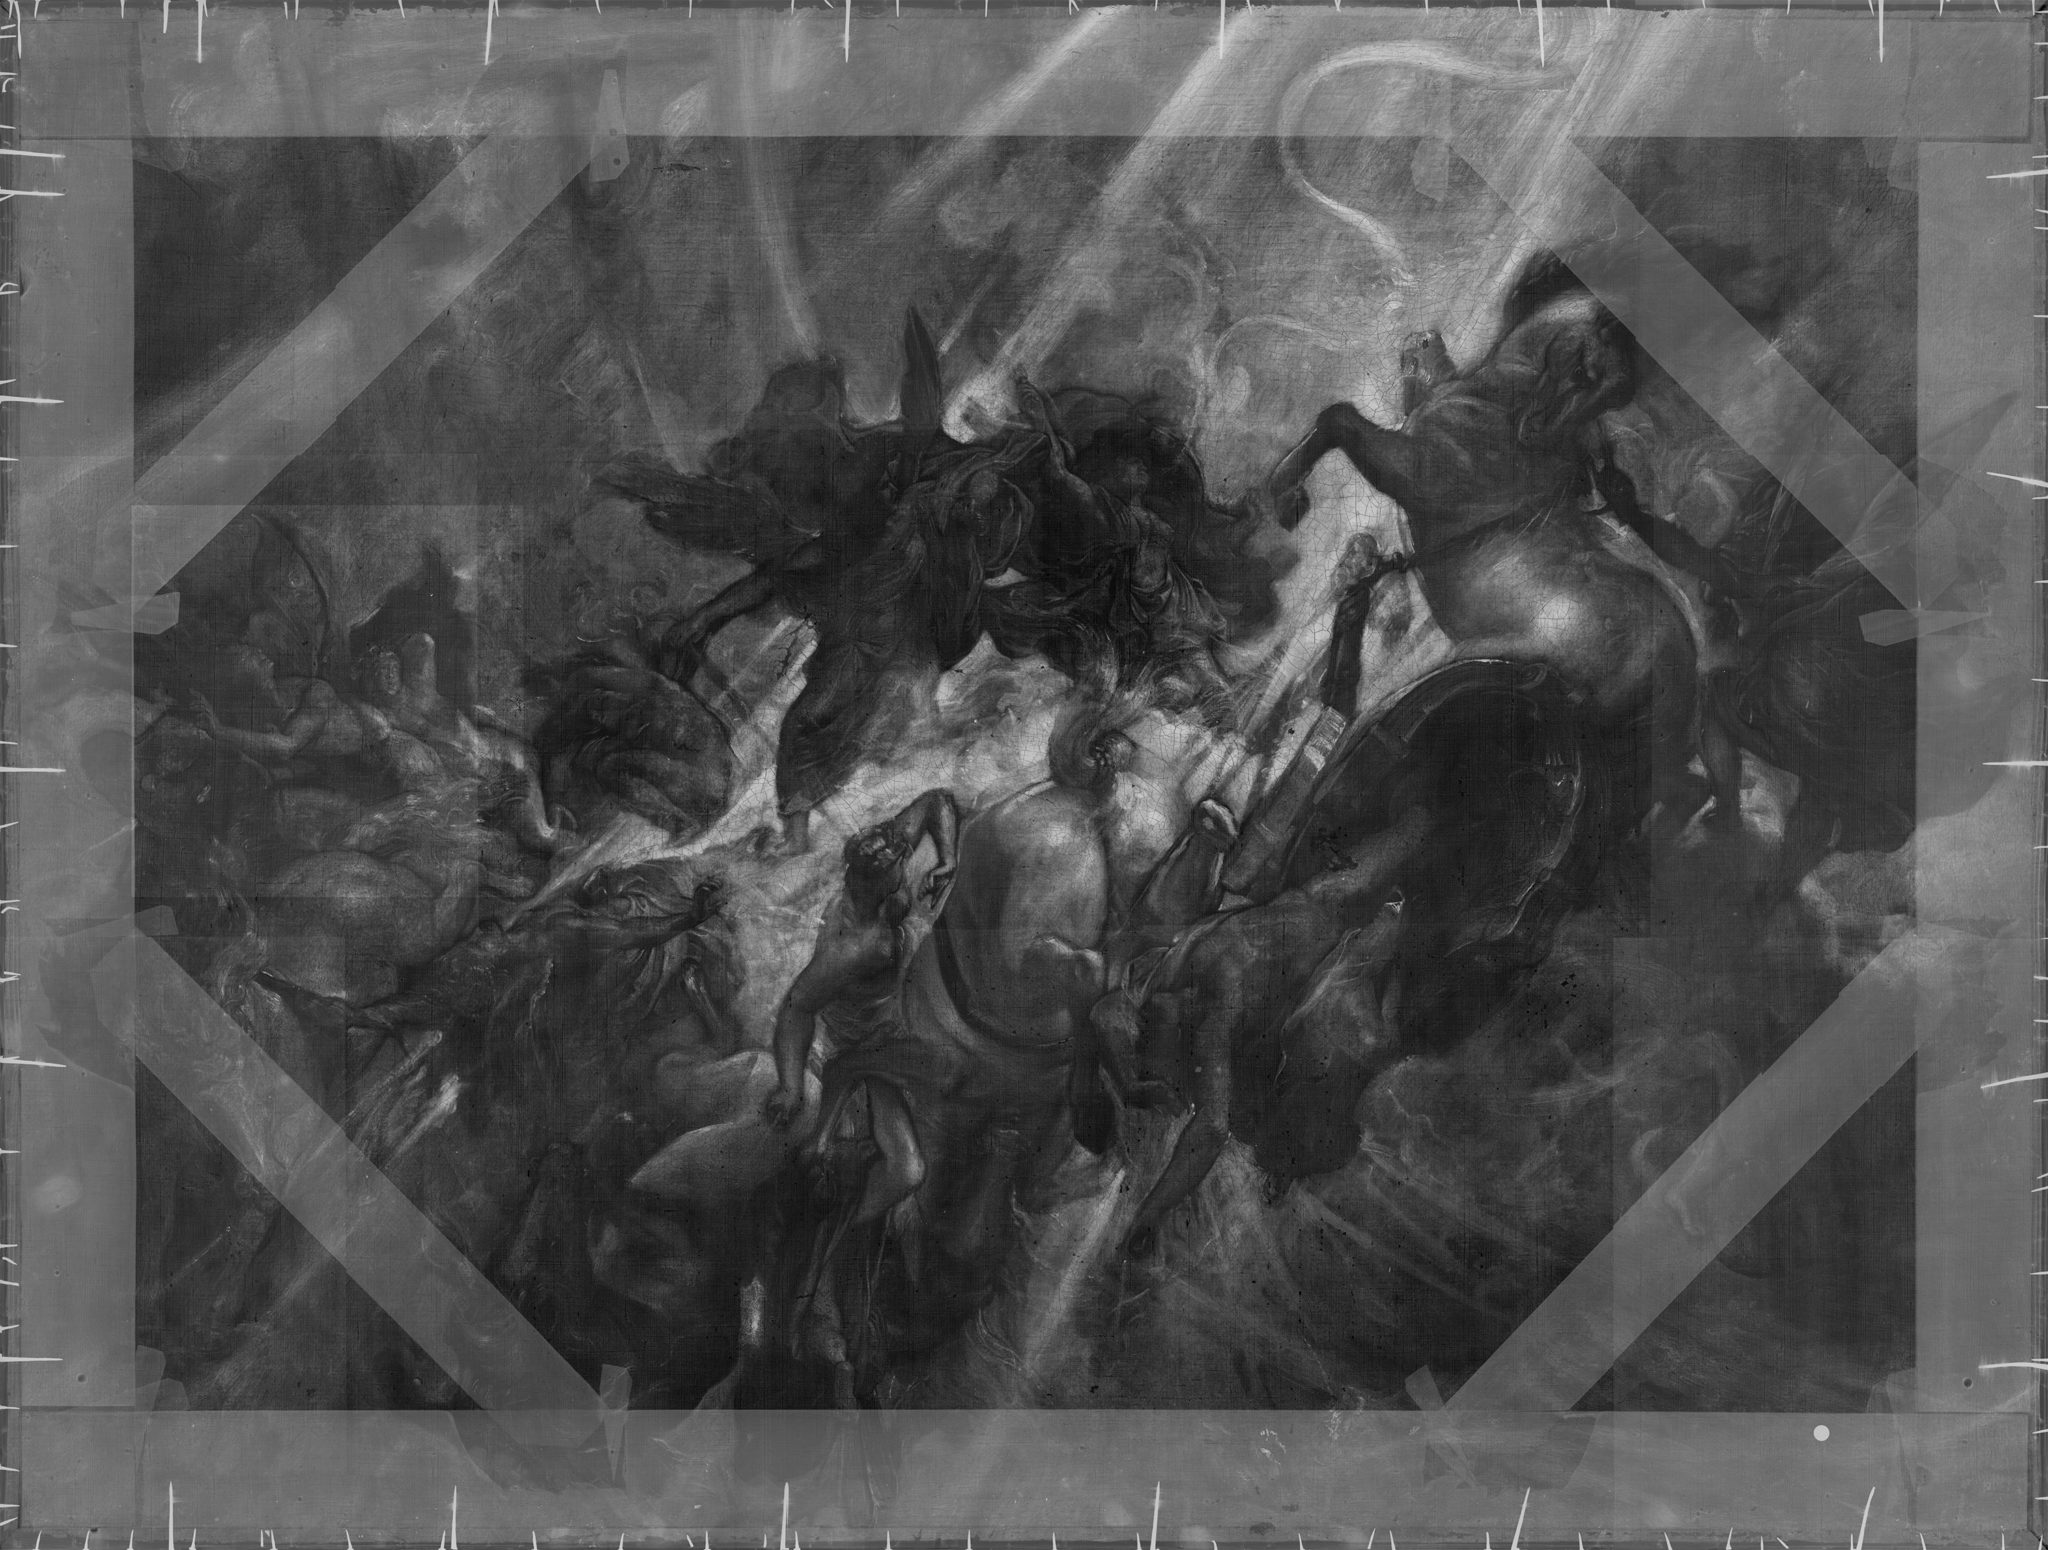
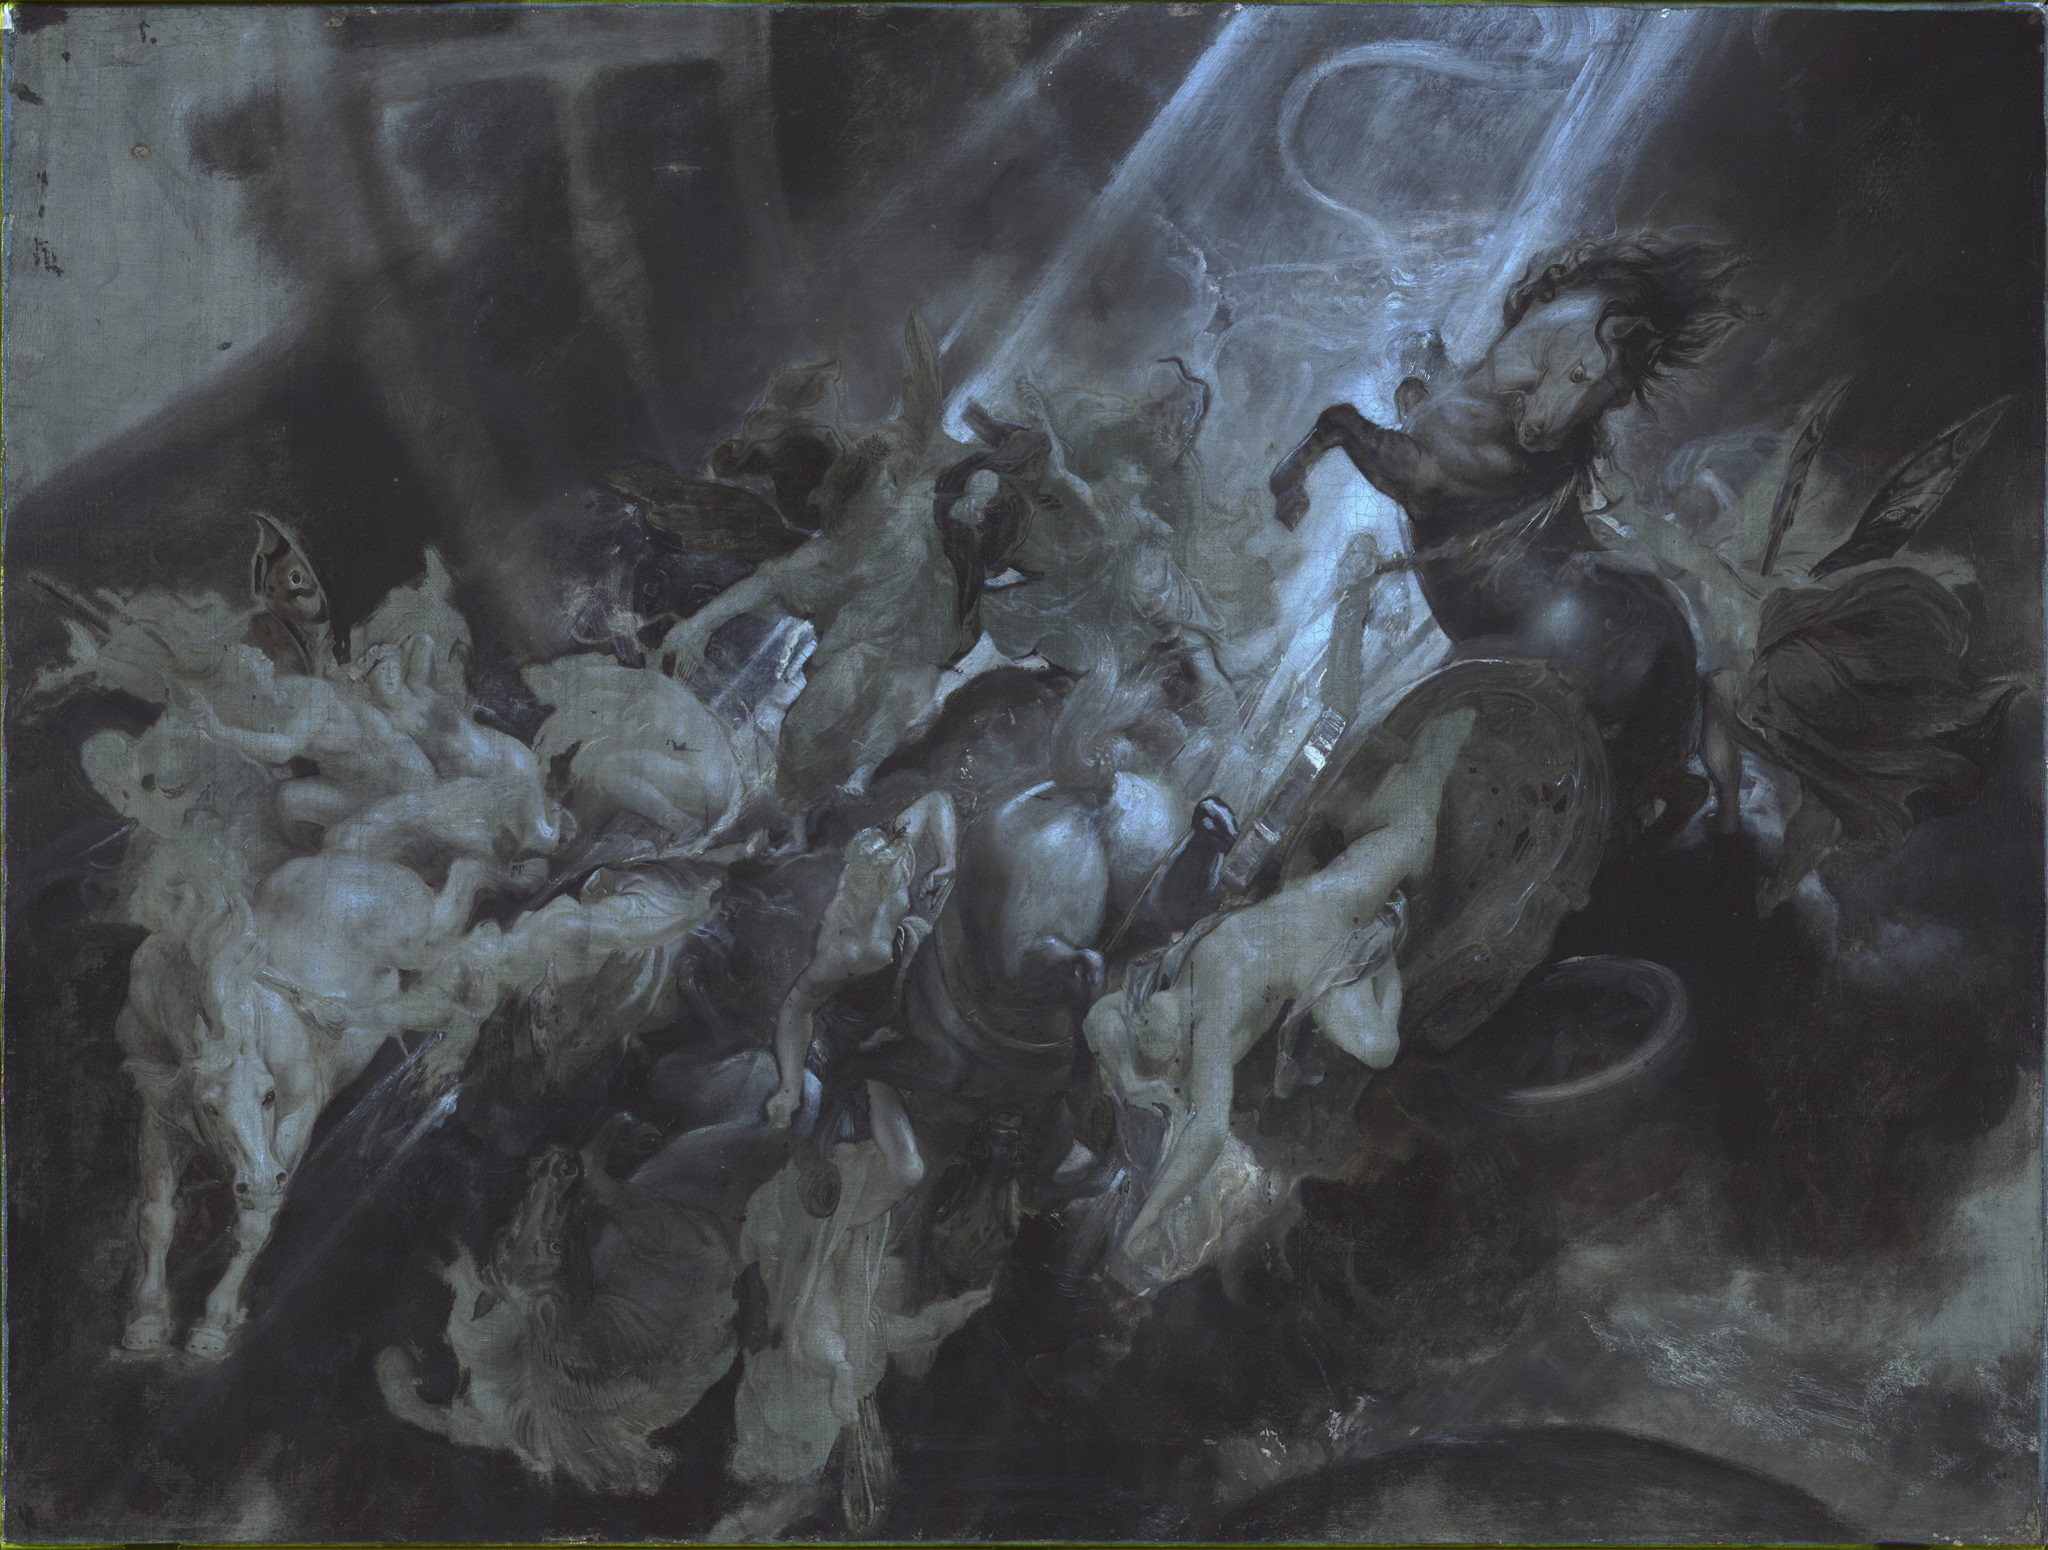
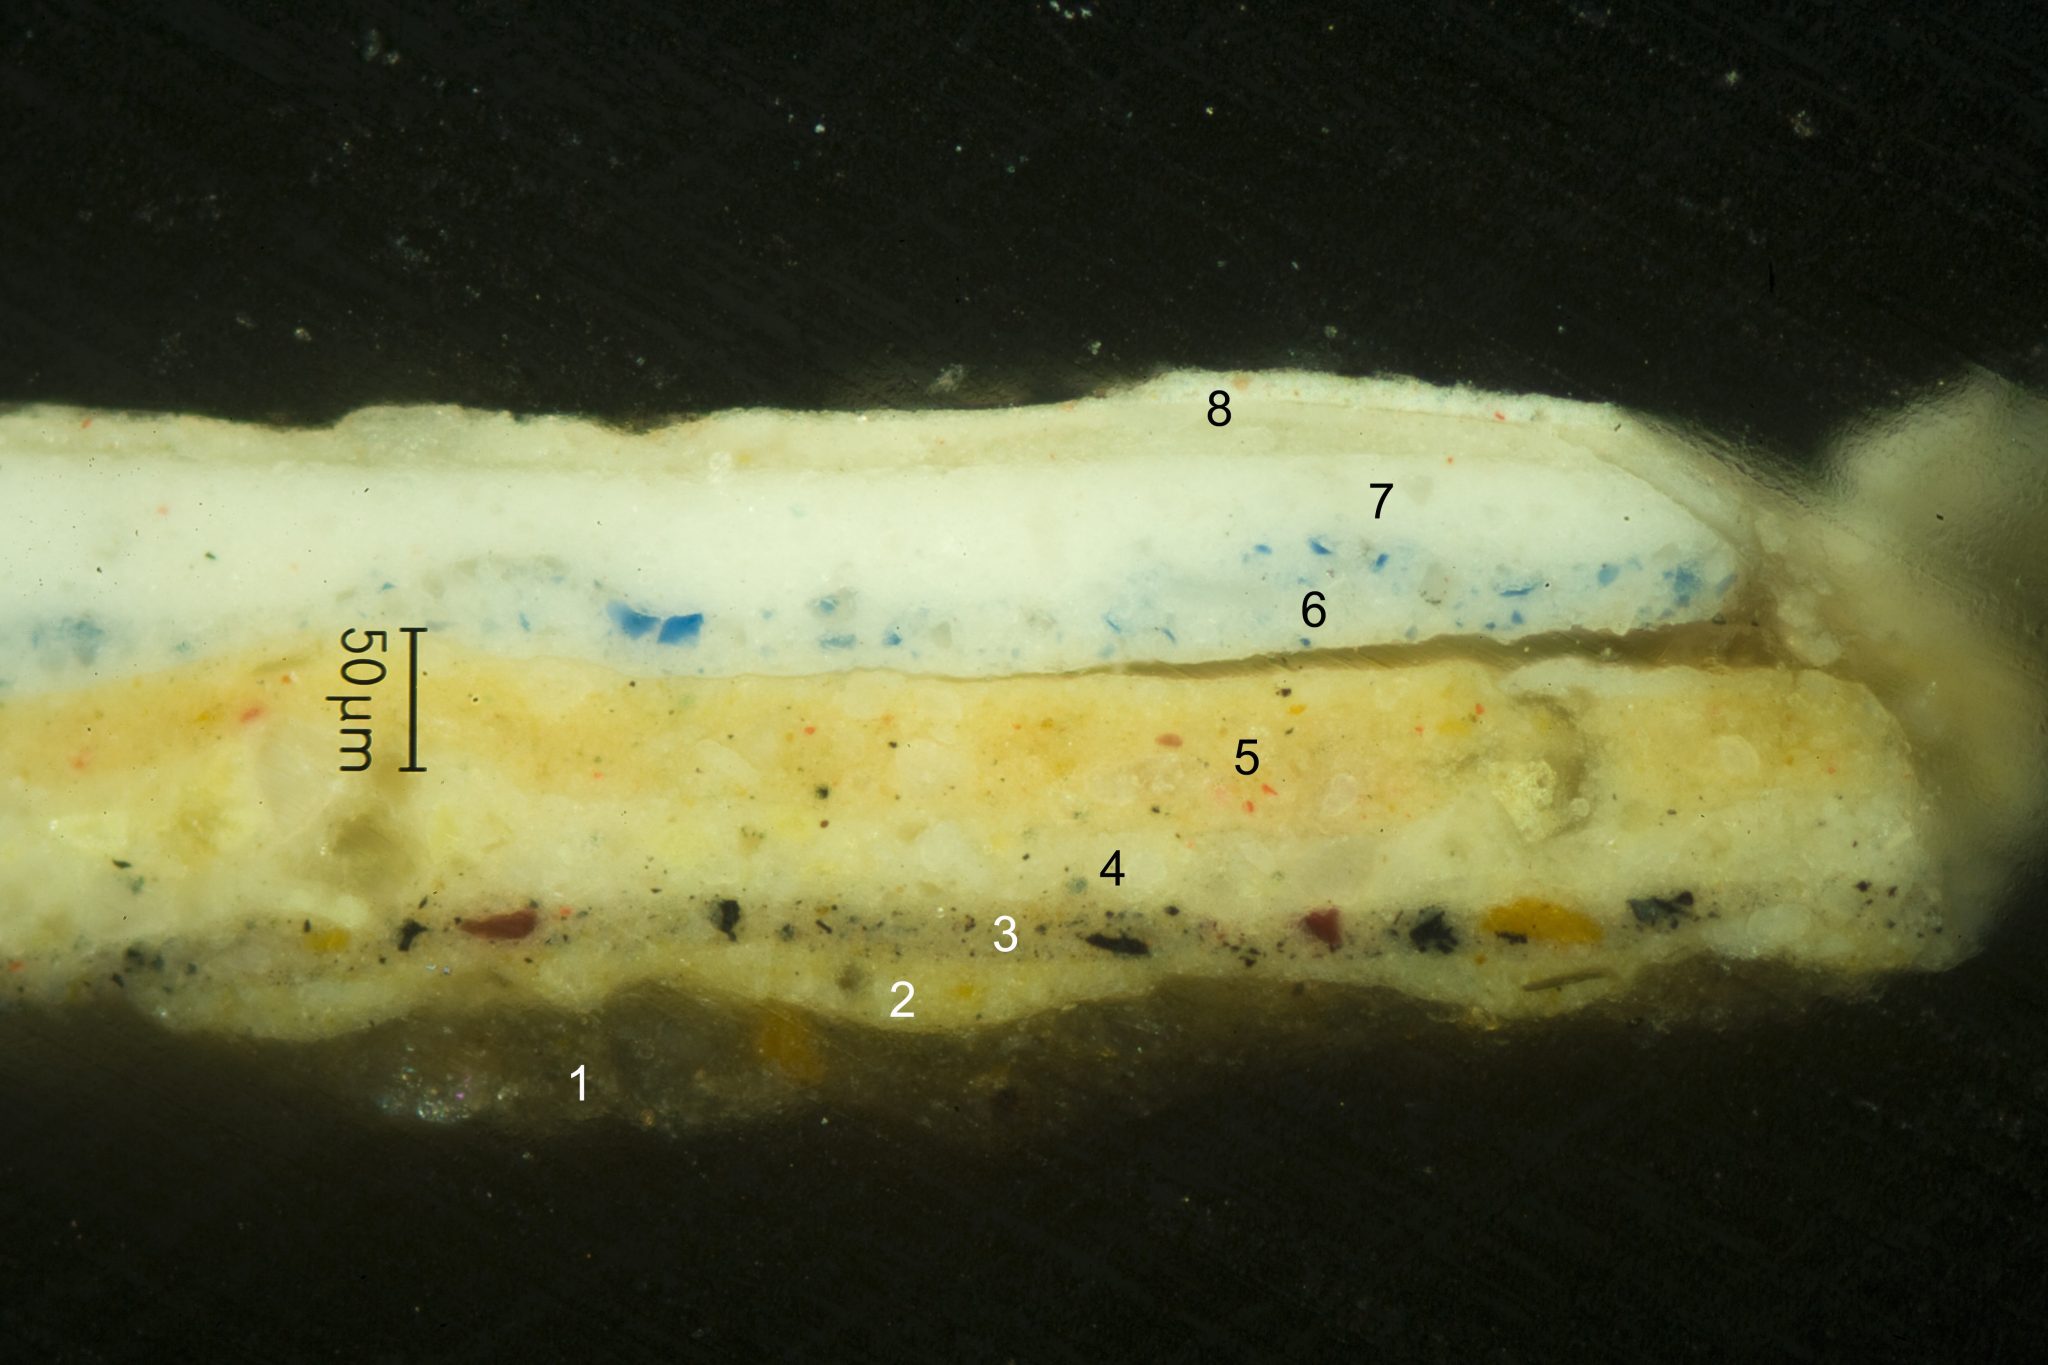
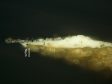
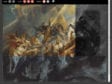
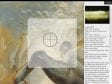
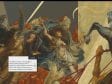
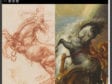
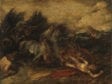
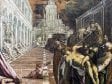
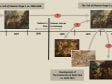
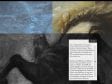
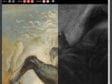
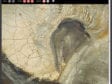
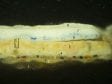
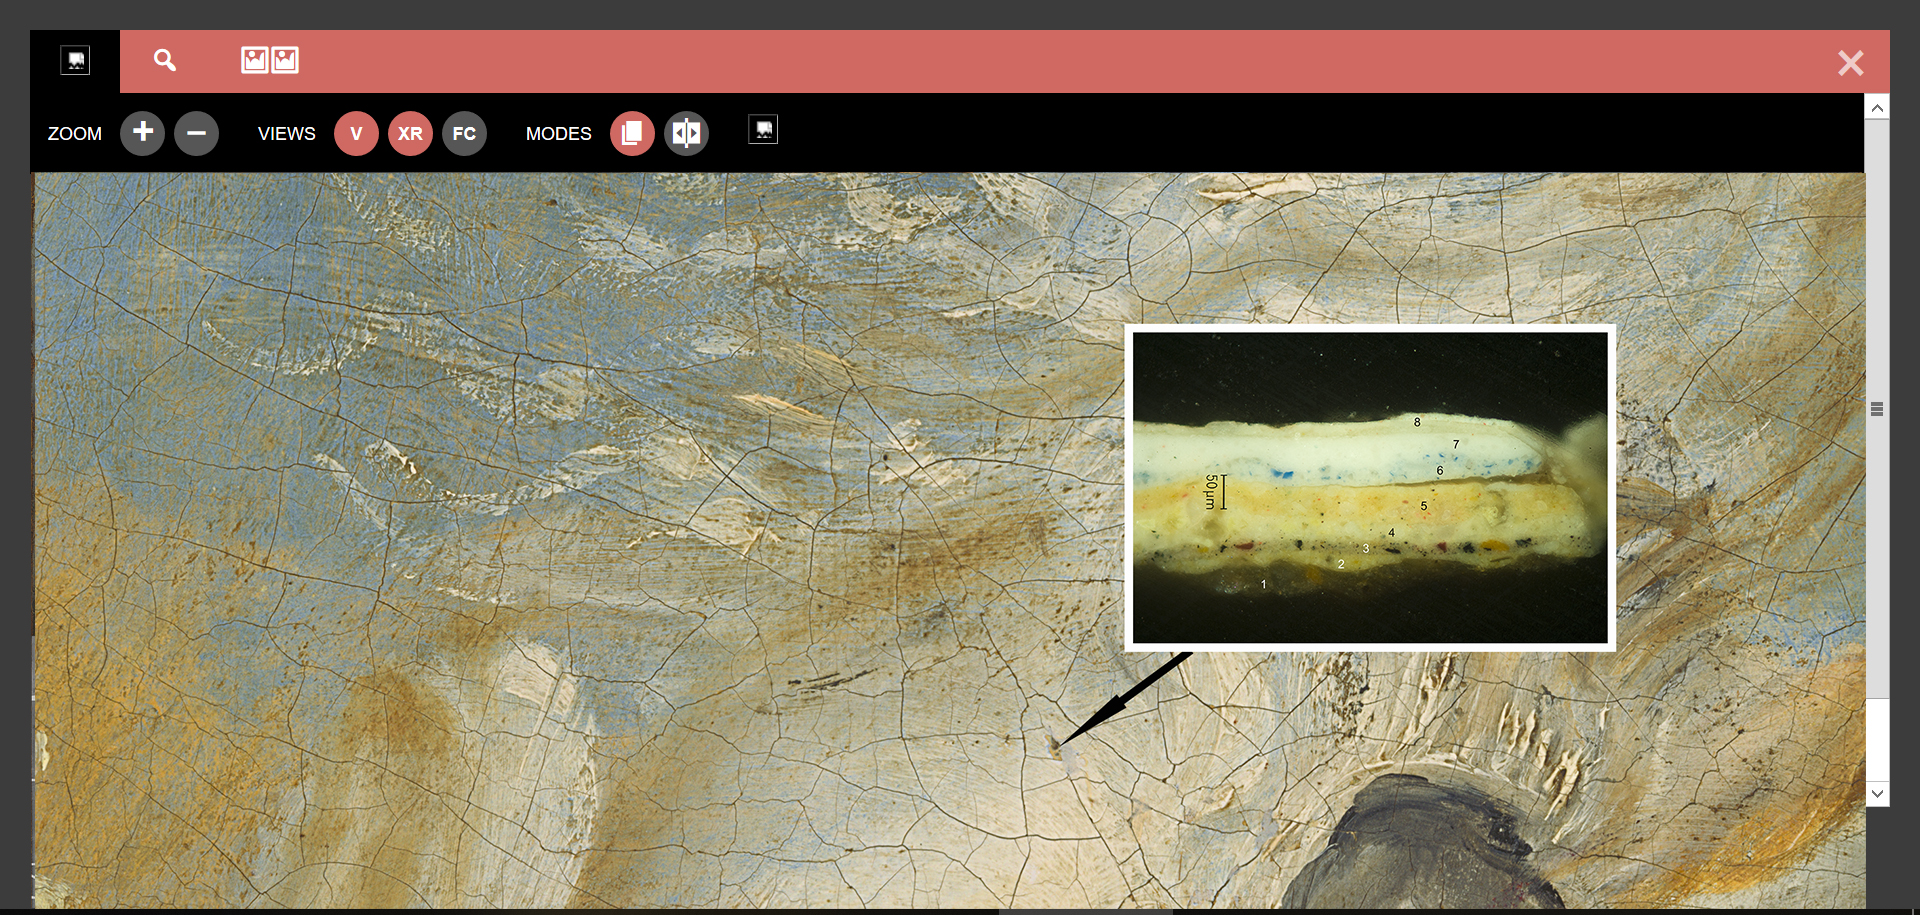
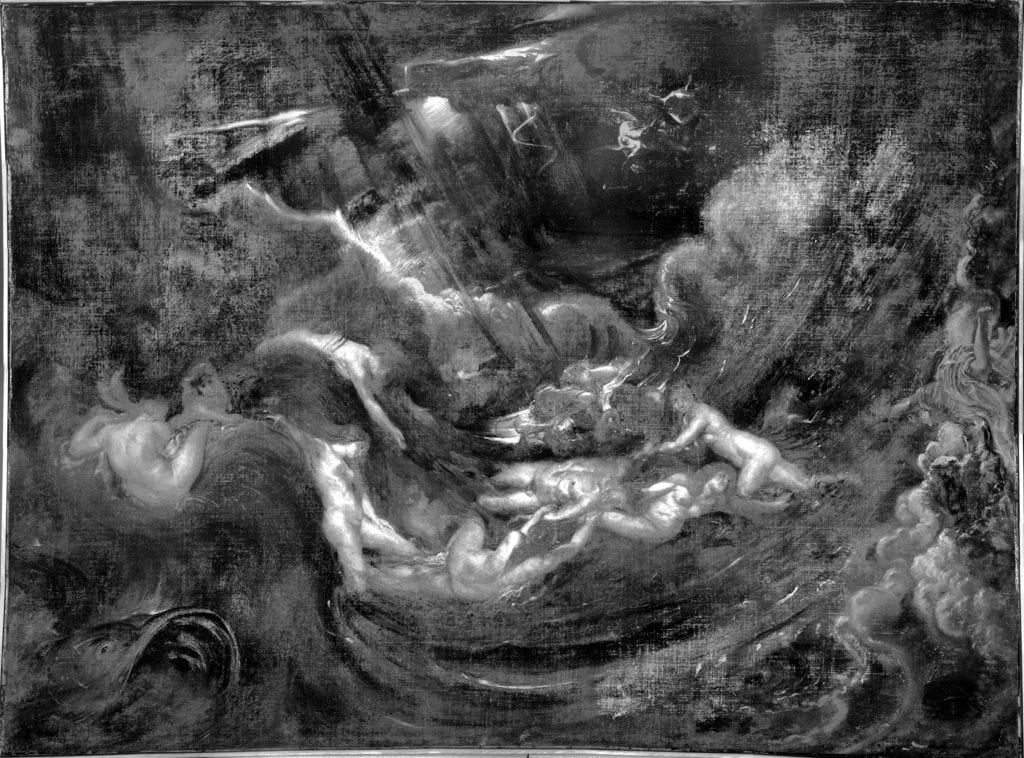
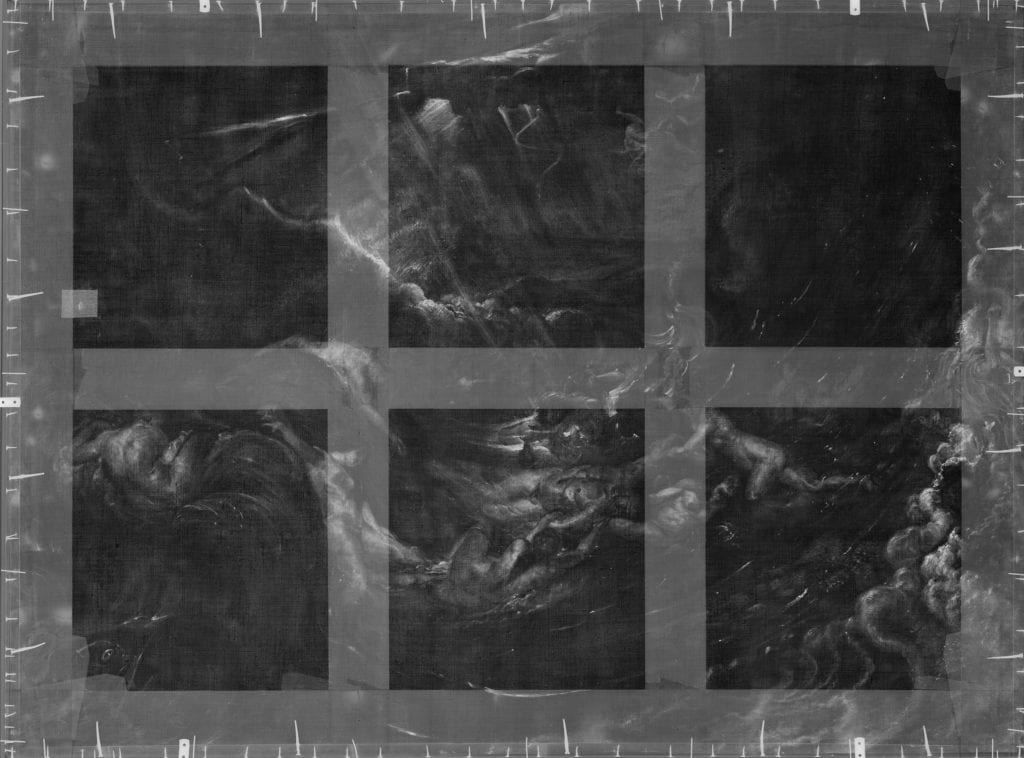
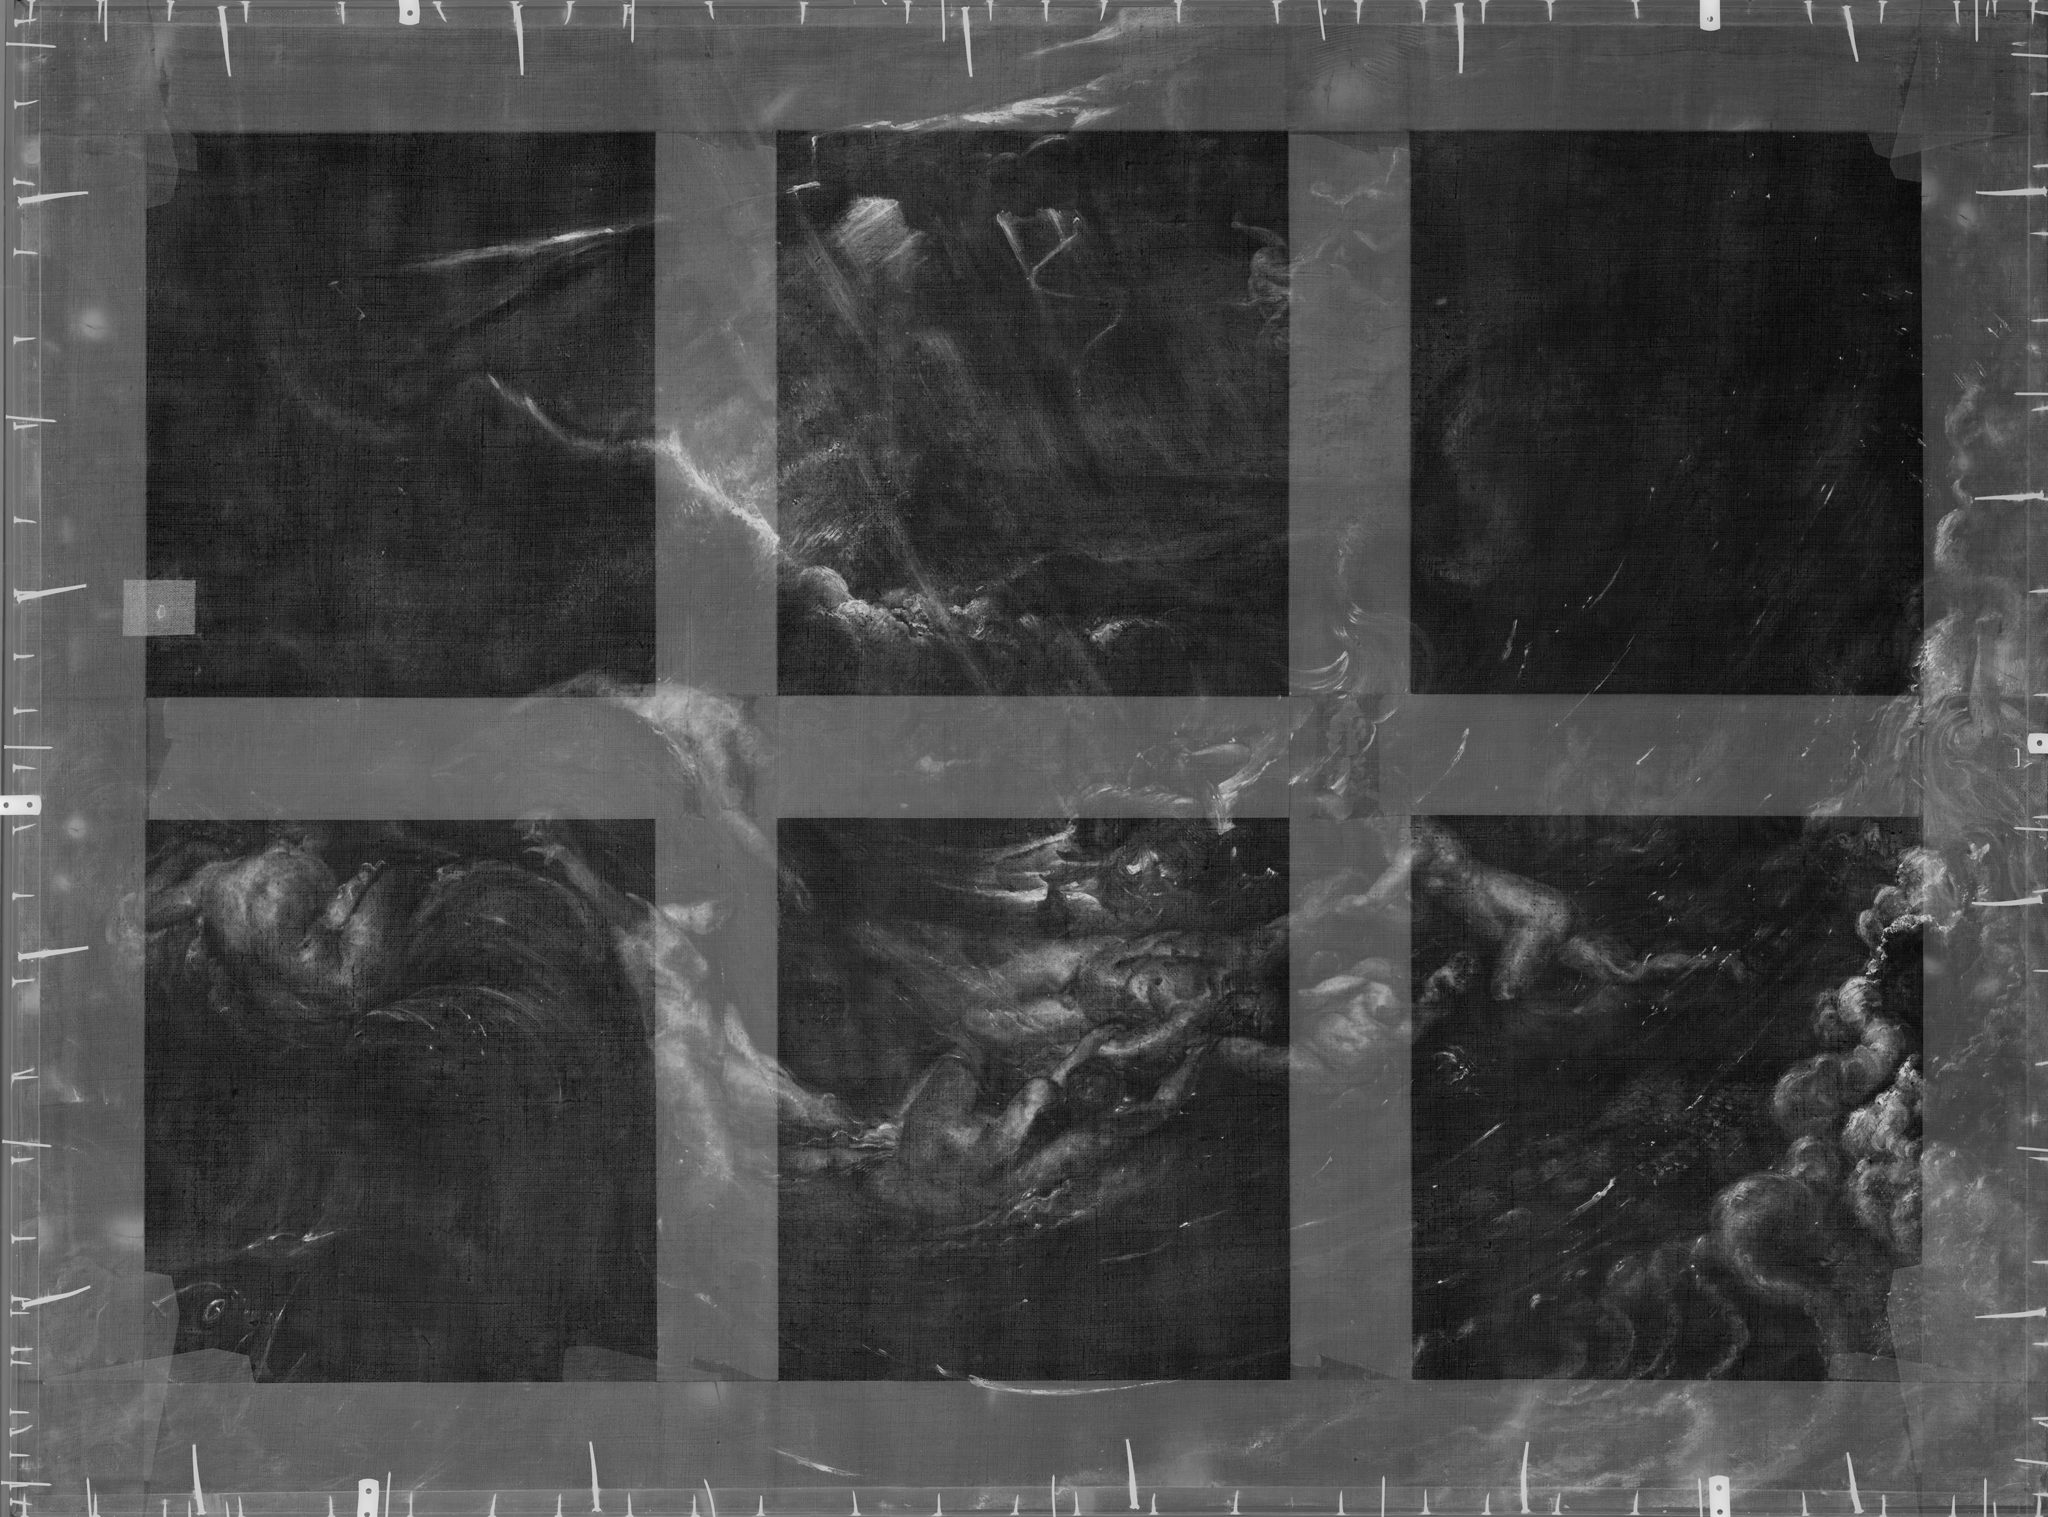
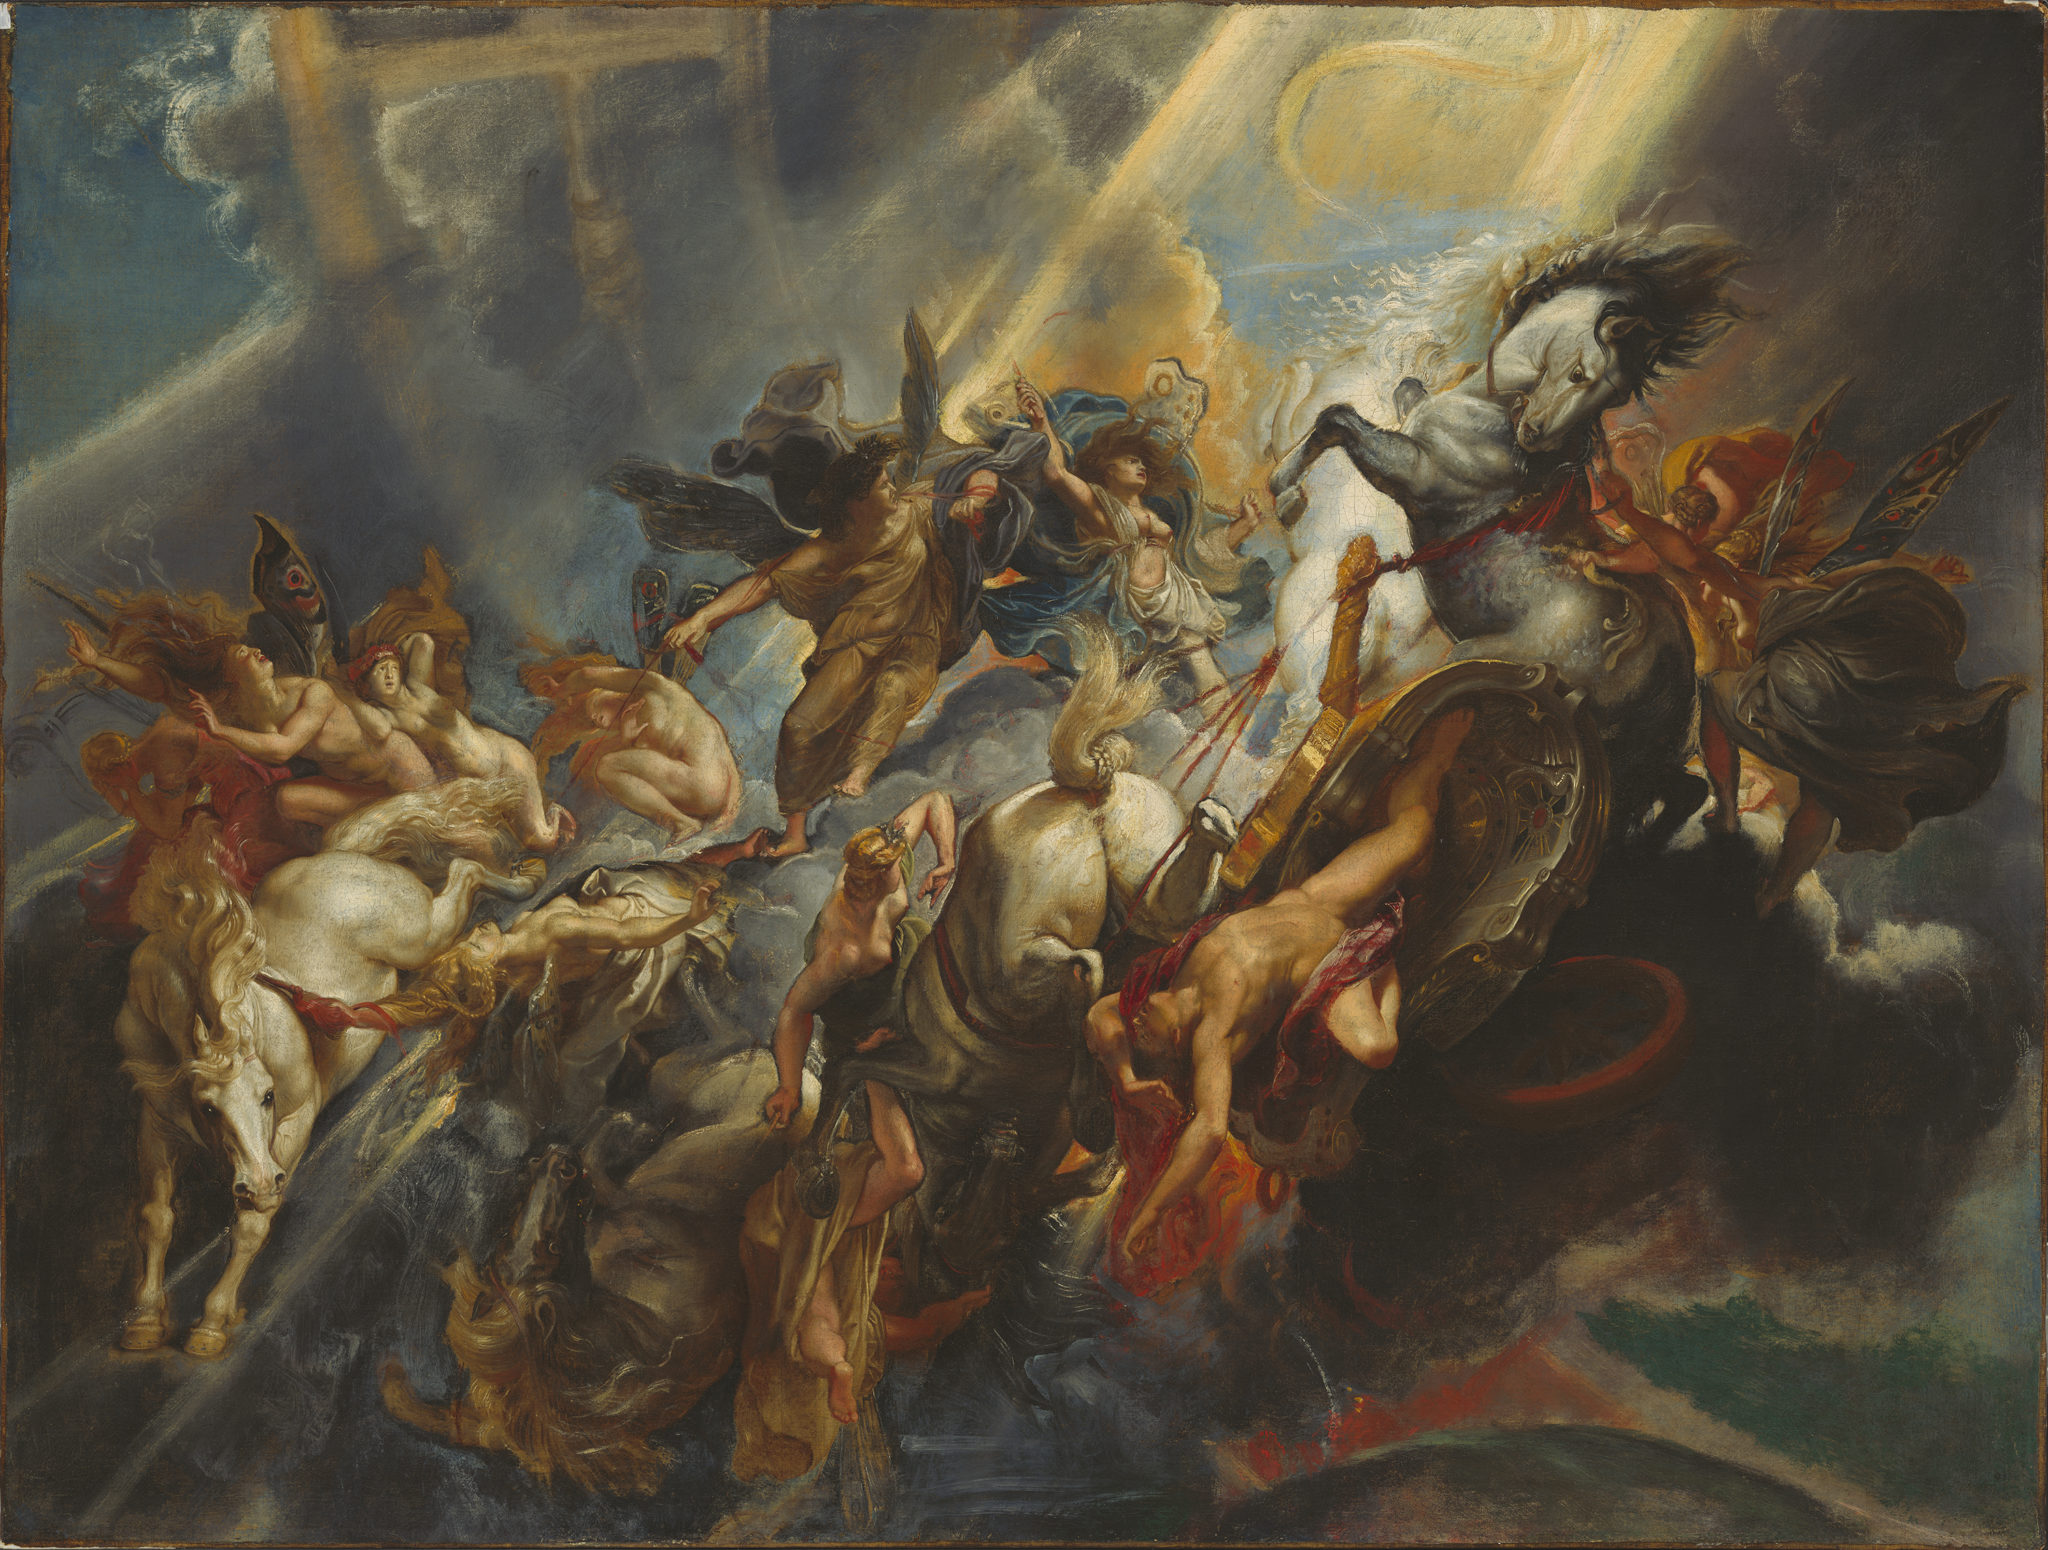
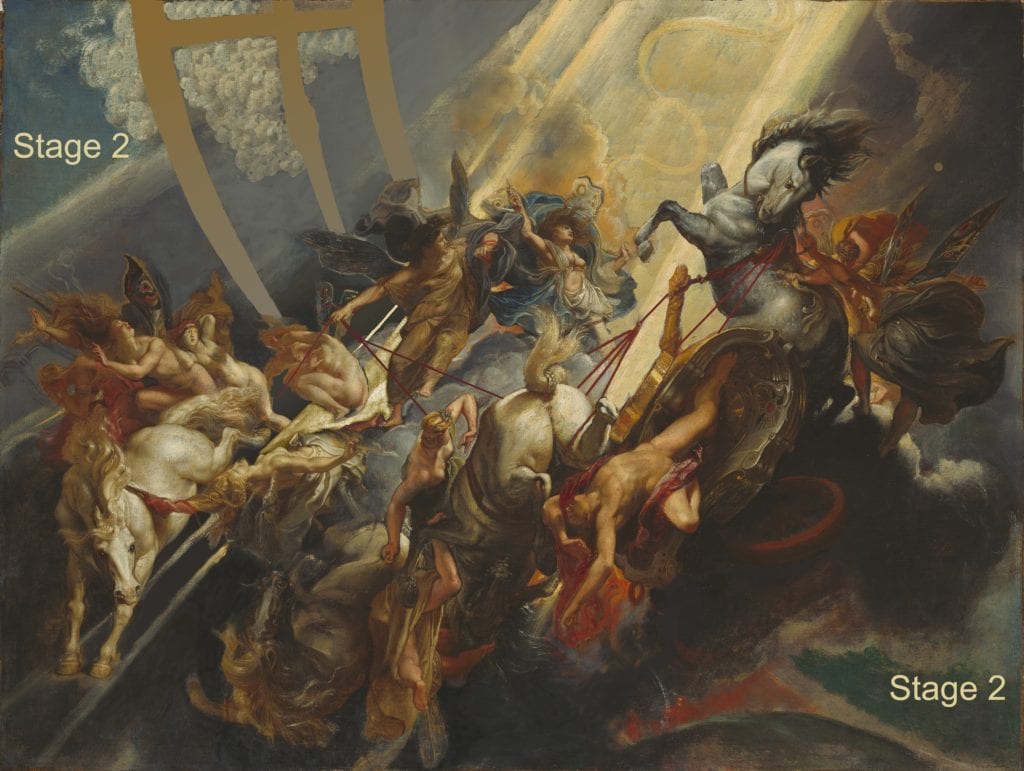
This section gives direct access to the image tools that are also embedded in the illustrations within the main article in this Issue,”Rubens’ Invention and Evolution: Material Evidence in The Fall of Phaeton.” Using the IIIF multi-mode viewer and the side-by-side viewer, the reader can undertake independent exploration of all the technical documents available for The Fall of Phaeton.

DOI: n/a
Fig a IIIF multi-mode viewer vis-xr-irr copy
Fig. a IIIF Multi-mode Viewer with visible / x-ray / IRR images The IIIF multi-mode viewer allows study of high-resolution, IIIF images (images registered in the International Image Interoperability Framework). Select images from the toolbar icons and use the mouse to pull these layered images aside horizontally or vertically, and zoom in for a highly magnified view. Click on this image to compare any area of the painting’s surface to the same area in the x-radiograph and false-color infrared reflectogram. [IIIF multi-mode viewer]
Fig b IIIF multi-mode viewer paint samples copy
Fig. b IIIF Multi-mode Viewer with cross sections / x-ray / IRR images Another option in the IIIF multi-mode viewer allows study of microscopic paint cross sections “in situ.” Such a sample (a minute fragment taken from the edge of an existing paint loss) shows all stages of the painting at the point the sample was taken. Click on this image to open the IIIF multi-mode viewer, then zoom in at the sample locations marked on the painting's image to view each cross section. Select images from the toolbar icons and use the mouse to pull the layered images aside to study the same area in the x-radiograph and false-color infrared reflectogram. [IIIF multi-mode viewer]
Fig c IIIF multi-mode viewer with Stages 1-2-3
Fig. c IIIF Multi-mode Viewer with Stage 1 / Stage 2 / Stage 3 images In a third option, the IIIF multi-mode viewer can also be used to compare schematic mock-up images of Rubens’ first composition of The Fall of Phaeton (Stage 1) and his first revisions made in Italy (Stage 2) with the final revisions he made in Antwerp: the painting as it appears today (Stage 3). Annotations highlight Rubens’s significant changes. (Stage 1 and Stage 2 mock-ups created by E. Melanie Gifford) [IIIF multi-mode viewer]
Fig d side-by-side viewer copy
Fig. d Screen shot of the side-by-side viewer [side-by-side viewer]
Peter Paul Rubens, Hero and Leander, ca. 1605 Yale University Art Gallery, New Haven, CT
Fig. 22 Peter Paul Rubens, Hero and Leander, ca. 1605, oil on canvas, 95.9 x 128 cm. New Haven, CT, Yale University Art Gallery (artwork in the public domain) [side-by-side viewer]
Infrared reflectogram, Peter Paul Rubens, Hero and Leander
Fig. 24 Infrared reflectogram of Peter Paul Rubens, Hero and Leander (captured by Kelsey Wingel) [side-by-side viewer]
X-radiograph, Peter Paul Rubens, Hero and Leander
Fig. 25 X-radiograph of Peter Paul Rubens, Hero and Leander [side-by-side viewer]
Peter Paul Rubens, The Fall of Phaeton, begun ca. 1604-1605, completed ca. 1610–1612 (Stage 3), National Gallery of Art, Washington
Fig. 1 Peter Paul Rubens, The Fall of Phaeton, begun ca. 1604-1605, completed ca. 1610-1612 (Stage 3), oil on canvas, 98.4 x 131.2 cm. Washington, D.C., The National Gallery of Art, Patrons' Permanent Fund, 1990.1.1 (artwork in the public domain) [IIIF multi-mode viewer]
X-radiograph, Peter Paul Rubens, The Fall of Phaeton
Fig. 65 X-radiograph, The Fall of Phaeton (captured by Douglas Lachance) [IIIF multi-mode viewer]
False-color infrared reflectogram, Peter Paul Rubens, The Fall of Phaeton
Fig. 66 False-color infrared reflectogram, The Fall of Phaeton (captured by John Delaney and Kate Dooley) [IIIF multi-mode viewer]
Mock-up of Stage 1, Peter Paul Rubens, The Fall of Phaeton
Fig. 31 Mock-up of the original composition (Stage 1) of The Fall of Phaeton shows a dark tonality that seems more consistent with Hero and Leander (mock-up created by E. Melanie Gifford) [IIIF multi-mode viewer]
Mock-up of Stage 2 (the first revision) of The Fall of Phaeton
Fig. 39 Mock-up of Stage 2 (the first revision) of The Fall of Phaeton (mock-up created by E. Melanie Gifford). Rubens covered over the flames with gray clouds and expanded the lightning bolt into a diagonal wash of golden light. [IIIF multi-mode viewer]
Peter Paul Rubens, The Conversion of Saint Paul, ca. 1599-1601, The Princely Collections, Vaduz-Vienna
Fig. 46 Peter Paul Rubens, The Conversion of Saint Paul, ca. 1599-1601, oil on panel, 72 x 103 cm. © Vaduz-Vienna, Liechentstein, The Princely Collections (Scala, Florence / Art Resource, NY) (artwork in the public domain) [side-by-side viewer]
Peter Paul Rubens, The Transfiguration, ca. 1604–1606, Musee des Beaux-Arts de Nancy
Fig. 21 Peter Paul Rubens, The Transfiguration, ca. 1604-1606, oil on canvas, 407 x 670 cm. Musée des Beaux-Arts de Nancy, Cliché P. Mignon, Inv. 71 (artwork in the public domain) [side-by-side viewer]
Peter Paul Rubens, The Conversion of Saint Paul (oil sketch), ca. 1610-1612, The Courtauld Gallery, London
Fig. 47 Peter Paul Rubens, The Conversion of Saint Paul (oil sketch), ca. 1610-1612, oil on panel, 57.4 x 78.1 cm. London, The Courtauld Gallery, Bequest of Antoine (Count) Seilern (artwork in the public domain) [side-by-side viewer]
Peter Paul Rubens, The Conversion of Saint Paul (preparatory drawing), ca. 1610-1612, The Courtauld Gallery, London
Fig. 51 Peter Paul Rubens, The Conversion of Saint Paul (preparatory drawing), ca. 1610-1612, pen and brown ink with wash and white bodycolor on paper, 32.9 x 22.2 cm. London, The Courtauld Gallery, Bequest of Antoine (Count) Seilern (artwork in the public domain) [side-by-side viewer]
Peter Paul Rubens, The Conversion of Saint Paul (final painting), ca. 1610-1612, The Courtauld Gallery, London
Fig. 54 Peter Paul Rubens, The Conversion of Saint Paul, ca. 1610-1612, oil on panel, 95.2 x 120.7 cm. London, The Courtauld Gallery, Bequest of Antoine (Count) Seilern (artwork in the public domain) [side-by-side viewer]
Peter Paul Rubens, The Death of Hippolytus, ca. 1610-1612, The Courtauld Gallery, London
Fig. 59 Peter Paul Rubens, The Death of Hippolytus, ca. 1610-1612, oil on panel, 51 x 65.1 cm. London, The Courtauld Gallery, Bequest of Antoine (Count) Seilern (artwork in the public domain) [side-by-side viewer]
Peter Paul Rubens, The Death of Hippolytus, ca. 1610-1612, Fitzwilliam Museum, Cambridge
Fig. 60 Peter Paul Rubens, The Death of Hippolytus, ca. 1610-1612, oil on copper, 50.2 x 70.8 cm. © The Fitzwilliam Museum, Cambridge (Accepted by H.M. Government in Lieu of Inheritance Tax and allocated to the Fitzwilliam Museum, 1979, http://data.fitzmuseum.cam.ac.uk/id/object/1865 (artwork in the public domain) [side-by-side viewer]
Peter Paul Rubens, All Saints, ca. 1614, Boijmans van Beuningen, Rotterdam
Fig. z Peter Paul Rubens, All Saints, ca. 1614, oil sketch on panel, 38 x 58 cm. Rotterdam, Boijmans van Beuningen Museum, Schenking / Donation: A. J. Lamme 1863, Studio Tromp, Rotterdam (artwork in the public domain) [side-by-side viewer]
Peter Paul Rubens, A Lion Hunt, ca. 1614-1615, The National Gallery, London
Fig. 13 Peter Paul Rubens, A Lion Hunt, ca. 1614-1615, oil on panel, 73.6 x 105.4 cm. London, The National Gallery, bought 1871 (artwork in the public domain) [side-by-side viewer]
Leonardo da Vinci, A Rearing Horse, ca. 1503–1504, The Royal Collection Trust, London
Fig. 2 Leonardo da Vinci, A Rearing Horse, ca. 1503-1504, red chalk, pen, and ink on paper, 15.3 x 14.2 cm. London, The Royal Collection Trust, RCIN 912336 (artwork in the public domain). Formerly in the collection of Pompeo Leoni [side-by-side viewer]
Roman, Aphrodite or Crouching Venus, 2nd century AD, The Royal Collection Trust, London
Fig. 4 Roman, Aphrodite or "Crouching Venus," second century AD, marble, 125 x 53 x 65 cm. London, The Royal Collection Trust, RCIN 69746 (artwork in the public domain). Formerly in the Gonzaga Collection, Mantua [side-by-side viewer]
Accademia - St Mark's Body Brought to Venice by Jacopo Tintoretto
Fig. 6 Jacopo Tintoretto, The Transportation of the Body of Saint Mark, ca. 1562-1566, oil on canvas, 398 x 315 cm. Venice, Galleria dell’Accademia (artwork in the public domain) [side-by-side viewer]
Timeline, Peter Paul Rubens "The Fall of Phaeton"
Fig. e Timeline of Peter Paul Rubens, The Fall of Phaeton, begun ca. 1604-1605, completed ca. 1610-1612 (Stage 3), oil on canvas, 98.4 x 131.2 cm. The National Gallery of Art, Washington, DC (timeline created by E. Melanie Gifford) [side-by-side viewer]
Interpreting Technical Evidence in Peter Paul Rubens, The Fall of Phaeton
Fig. f IIIF Multi-mode Viewer with annotations interpreting visible / x-ray / IRR images Technical evidence requires interpretation, just as the stylistic evidence commonly used in art historical research does. Here, pop-up annotations tease out the evidence for Rubens’s changes by comparing close examination of the painting’s surface to the same areas in technical images: the x-radiograph and false-color infrared reflectogram. [IIIF multi-mode viewer]
Fig g IIIF multi-mode viewer with horses_s legs vis-xray copy
Fig. g In the IIIF multi-mode viewer, comparing visible light and x-ray images shows that Rubens changed the position of the gray horse’s leg when he added the white horse. [IIIF multi-mode viewer]
Fig h IIIF multi-mode viewer zoomed close to horses_s legs copy
Fig. h By zooming in at high magnification, we can see the brushstrokes of white paint that Rubens used to add the white horse overlapping the lower leg of the original gray horse. [IIIF multi-mode viewer]
Center right, white horse
Fig. cross-section-R939B Center right, added white horse in The Fall of Phaeton (layer 8: later restoration) Stage 3: blue sky and white horse (two layers); layer 7 (white): white lead; layer 6 (blue): white lead, ultramarine Stage 2: golden light (two layers); layer 5: white lead, yellow ochre; layer 4: white lead, lead-tin yellow Stage 1: gray smoke (two layers); layer 3: white lead, charcoal black, red and yellow ochre, red lake; layer 2: white lead, charcoal black, yellow ochre Ground: (yellow-tan), layer 1: siliceous earths, calcite (with traces of dolomite), yellow ochre, charcoal black [IIIF multi-mode viewer]
Peter Paul Rubens, The Fall of Phaeton (cross-section locations)
Fig. i Peter Paul Rubens, The Fall of Phaeton (cross-section locations), begun ca. 1604-1605, completed ca. 1610-1612 (Stage 3), oil on canvas, 98.4 x 131.2 cm. The National Gallery of Art, Washington, DC (photo: Greg Williams, mockup by E. Melanie Gifford) (artwork in the public domain) [IIIF multi-mode viewer]
Lower right, below Phaeton
Fig. cross-section-R1052 Lower right, below Phaeton in The Fall of Phaeton Stage 3: black clouds, layer 4: charcoal black, bone black Stage 1: gray, ruddy smoke with a streak of yellow light (two layers); layer 3 (yellow light): white lead, yellow ochre, some lead-tin yellow; layer 2 (smoke): white lead, charcoal black, vermilion, red lake Ground: (yellow-tan), layer 1: siliceous earths, calcite (with traces of dolomite), yellow ochre, charcoal black [IIIF multi-mode viewer]
Center left, beside Hora
Fig. cross-section-R1053 Center left, beside Hora, in The Fall of Phaeton (layer 6: later restoration) Stage 3 blue sky, layer 5: white lead, ultramarine Stage 2(?) thin, yellow-white streak of light, layer 4: white lead, lead-tin yellow Stage 1 black sky (two layers); layer 3: charcoal black, bone black, white lead, vermilion; layer 2: charcoal black, white lead, red lake Ground (yellow-tan), layer 1: siliceous earths, calcite (with traces of dolomite), yellow ochre, charcoal black   [IIIF multi-mode viewer]
Top edge, right, wash of golden light near lightning bolt
Fig. cross-section-R940 Top edge, right, wash of golden light near lightning bolt in The Fall of Phaeton Stage 2: yellow radiance, layer 3: white lead, lead-tin yellow Stage 1: gray sky, layer 2: white lead, charcoal black, vermilion Ground (yellow-tan), layer 1: siliceous earths, calcite (with traces of dolomite), yellow ochre, charcoal black [IIIF multi-mode viewer]
Top edge, left, clouds behind zodiac wheel
Fig. cross-section-R941 Top edge, left, clouds behind zodiac wheel in The Fall of Phaeton Stage 2 or 3: gray clouds, layer 3: white lead, charcoal black, traces of vermilion Stage 1: white clouds, layer 2: white lead, possible traces of ultramarine, lead-tin yellow Ground: (yellow-tan), layer 1: siliceous earths, calcite (with traces of dolomite), yellow ochre, charcoal black [IIIF multi-mode viewer]

List of Illustrations

Fig a IIIF multi-mode viewer vis-xr-irr copy
Fig. a IIIF Multi-mode Viewer with visible / x-ray / IRR images The IIIF multi-mode viewer allows study of high-resolution, IIIF images (images registered in the International Image Interoperability Framework). Select images from the toolbar icons and use the mouse to pull these layered images aside horizontally or vertically, and zoom in for a highly magnified view. Click on this image to compare any area of the painting’s surface to the same area in the x-radiograph and false-color infrared reflectogram. [IIIF multi-mode viewer]
Fig b IIIF multi-mode viewer paint samples copy
Fig. b IIIF Multi-mode Viewer with cross sections / x-ray / IRR images Another option in the IIIF multi-mode viewer allows study of microscopic paint cross sections “in situ.” Such a sample (a minute fragment taken from the edge of an existing paint loss) shows all stages of the painting at the point the sample was taken. Click on this image to open the IIIF multi-mode viewer, then zoom in at the sample locations marked on the painting's image to view each cross section. Select images from the toolbar icons and use the mouse to pull the layered images aside to study the same area in the x-radiograph and false-color infrared reflectogram. [IIIF multi-mode viewer]
Fig c IIIF multi-mode viewer with Stages 1-2-3
Fig. c IIIF Multi-mode Viewer with Stage 1 / Stage 2 / Stage 3 images In a third option, the IIIF multi-mode viewer can also be used to compare schematic mock-up images of Rubens’ first composition of The Fall of Phaeton (Stage 1) and his first revisions made in Italy (Stage 2) with the final revisions he made in Antwerp: the painting as it appears today (Stage 3). Annotations highlight Rubens’s significant changes. (Stage 1 and Stage 2 mock-ups created by E. Melanie Gifford) [IIIF multi-mode viewer]
Fig d side-by-side viewer copy
Fig. d Screen shot of the side-by-side viewer [side-by-side viewer]
Peter Paul Rubens, Hero and Leander, ca. 1605 Yale University Art Gallery, New Haven, CT
Fig. 22 Peter Paul Rubens, Hero and Leander, ca. 1605, oil on canvas, 95.9 x 128 cm. New Haven, CT, Yale University Art Gallery (artwork in the public domain) [side-by-side viewer]
Infrared reflectogram, Peter Paul Rubens, Hero and Leander
Fig. 24 Infrared reflectogram of Peter Paul Rubens, Hero and Leander (captured by Kelsey Wingel) [side-by-side viewer]
X-radiograph, Peter Paul Rubens, Hero and Leander
Fig. 25 X-radiograph of Peter Paul Rubens, Hero and Leander [side-by-side viewer]
Peter Paul Rubens, The Fall of Phaeton, begun ca. 1604-1605, completed ca. 1610–1612 (Stage 3), National Gallery of Art, Washington
Fig. 1 Peter Paul Rubens, The Fall of Phaeton, begun ca. 1604-1605, completed ca. 1610-1612 (Stage 3), oil on canvas, 98.4 x 131.2 cm. Washington, D.C., The National Gallery of Art, Patrons' Permanent Fund, 1990.1.1 (artwork in the public domain) [IIIF multi-mode viewer]
X-radiograph, Peter Paul Rubens, The Fall of Phaeton
Fig. 65 X-radiograph, The Fall of Phaeton (captured by Douglas Lachance) [IIIF multi-mode viewer]
False-color infrared reflectogram, Peter Paul Rubens, The Fall of Phaeton
Fig. 66 False-color infrared reflectogram, The Fall of Phaeton (captured by John Delaney and Kate Dooley) [IIIF multi-mode viewer]
Mock-up of Stage 1, Peter Paul Rubens, The Fall of Phaeton
Fig. 31 Mock-up of the original composition (Stage 1) of The Fall of Phaeton shows a dark tonality that seems more consistent with Hero and Leander (mock-up created by E. Melanie Gifford) [IIIF multi-mode viewer]
Mock-up of Stage 2 (the first revision) of The Fall of Phaeton
Fig. 39 Mock-up of Stage 2 (the first revision) of The Fall of Phaeton (mock-up created by E. Melanie Gifford). Rubens covered over the flames with gray clouds and expanded the lightning bolt into a diagonal wash of golden light. [IIIF multi-mode viewer]
Peter Paul Rubens, The Conversion of Saint Paul, ca. 1599-1601, The Princely Collections, Vaduz-Vienna
Fig. 46 Peter Paul Rubens, The Conversion of Saint Paul, ca. 1599-1601, oil on panel, 72 x 103 cm. © Vaduz-Vienna, Liechentstein, The Princely Collections (Scala, Florence / Art Resource, NY) (artwork in the public domain) [side-by-side viewer]
Peter Paul Rubens, The Transfiguration, ca. 1604–1606, Musee des Beaux-Arts de Nancy
Fig. 21 Peter Paul Rubens, The Transfiguration, ca. 1604-1606, oil on canvas, 407 x 670 cm. Musée des Beaux-Arts de Nancy, Cliché P. Mignon, Inv. 71 (artwork in the public domain) [side-by-side viewer]
Peter Paul Rubens, The Conversion of Saint Paul (oil sketch), ca. 1610-1612, The Courtauld Gallery, London
Fig. 47 Peter Paul Rubens, The Conversion of Saint Paul (oil sketch), ca. 1610-1612, oil on panel, 57.4 x 78.1 cm. London, The Courtauld Gallery, Bequest of Antoine (Count) Seilern (artwork in the public domain) [side-by-side viewer]
Peter Paul Rubens, The Conversion of Saint Paul (preparatory drawing), ca. 1610-1612, The Courtauld Gallery, London
Fig. 51 Peter Paul Rubens, The Conversion of Saint Paul (preparatory drawing), ca. 1610-1612, pen and brown ink with wash and white bodycolor on paper, 32.9 x 22.2 cm. London, The Courtauld Gallery, Bequest of Antoine (Count) Seilern (artwork in the public domain) [side-by-side viewer]
Peter Paul Rubens, The Conversion of Saint Paul (final painting), ca. 1610-1612, The Courtauld Gallery, London
Fig. 54 Peter Paul Rubens, The Conversion of Saint Paul, ca. 1610-1612, oil on panel, 95.2 x 120.7 cm. London, The Courtauld Gallery, Bequest of Antoine (Count) Seilern (artwork in the public domain) [side-by-side viewer]
Peter Paul Rubens, The Death of Hippolytus, ca. 1610-1612, The Courtauld Gallery, London
Fig. 59 Peter Paul Rubens, The Death of Hippolytus, ca. 1610-1612, oil on panel, 51 x 65.1 cm. London, The Courtauld Gallery, Bequest of Antoine (Count) Seilern (artwork in the public domain) [side-by-side viewer]
Peter Paul Rubens, The Death of Hippolytus, ca. 1610-1612, Fitzwilliam Museum, Cambridge
Fig. 60 Peter Paul Rubens, The Death of Hippolytus, ca. 1610-1612, oil on copper, 50.2 x 70.8 cm. © The Fitzwilliam Museum, Cambridge (Accepted by H.M. Government in Lieu of Inheritance Tax and allocated to the Fitzwilliam Museum, 1979, http://data.fitzmuseum.cam.ac.uk/id/object/1865 (artwork in the public domain) [side-by-side viewer]
Peter Paul Rubens, All Saints, ca. 1614, Boijmans van Beuningen, Rotterdam
Fig. z Peter Paul Rubens, All Saints, ca. 1614, oil sketch on panel, 38 x 58 cm. Rotterdam, Boijmans van Beuningen Museum, Schenking / Donation: A. J. Lamme 1863, Studio Tromp, Rotterdam (artwork in the public domain) [side-by-side viewer]
Peter Paul Rubens, A Lion Hunt, ca. 1614-1615, The National Gallery, London
Fig. 13 Peter Paul Rubens, A Lion Hunt, ca. 1614-1615, oil on panel, 73.6 x 105.4 cm. London, The National Gallery, bought 1871 (artwork in the public domain) [side-by-side viewer]
Leonardo da Vinci, A Rearing Horse, ca. 1503–1504, The Royal Collection Trust, London
Fig. 2 Leonardo da Vinci, A Rearing Horse, ca. 1503-1504, red chalk, pen, and ink on paper, 15.3 x 14.2 cm. London, The Royal Collection Trust, RCIN 912336 (artwork in the public domain). Formerly in the collection of Pompeo Leoni [side-by-side viewer]
Roman, Aphrodite or Crouching Venus, 2nd century AD, The Royal Collection Trust, London
Fig. 4 Roman, Aphrodite or "Crouching Venus," second century AD, marble, 125 x 53 x 65 cm. London, The Royal Collection Trust, RCIN 69746 (artwork in the public domain). Formerly in the Gonzaga Collection, Mantua [side-by-side viewer]
Accademia - St Mark's Body Brought to Venice by Jacopo Tintoretto
Fig. 6 Jacopo Tintoretto, The Transportation of the Body of Saint Mark, ca. 1562-1566, oil on canvas, 398 x 315 cm. Venice, Galleria dell’Accademia (artwork in the public domain) [side-by-side viewer]
Timeline, Peter Paul Rubens "The Fall of Phaeton"
Fig. e Timeline of Peter Paul Rubens, The Fall of Phaeton, begun ca. 1604-1605, completed ca. 1610-1612 (Stage 3), oil on canvas, 98.4 x 131.2 cm. The National Gallery of Art, Washington, DC (timeline created by E. Melanie Gifford) [side-by-side viewer]
Interpreting Technical Evidence in Peter Paul Rubens, The Fall of Phaeton
Fig. f IIIF Multi-mode Viewer with annotations interpreting visible / x-ray / IRR images Technical evidence requires interpretation, just as the stylistic evidence commonly used in art historical research does. Here, pop-up annotations tease out the evidence for Rubens’s changes by comparing close examination of the painting’s surface to the same areas in technical images: the x-radiograph and false-color infrared reflectogram. [IIIF multi-mode viewer]
Fig g IIIF multi-mode viewer with horses_s legs vis-xray copy
Fig. g In the IIIF multi-mode viewer, comparing visible light and x-ray images shows that Rubens changed the position of the gray horse’s leg when he added the white horse. [IIIF multi-mode viewer]
Fig h IIIF multi-mode viewer zoomed close to horses_s legs copy
Fig. h By zooming in at high magnification, we can see the brushstrokes of white paint that Rubens used to add the white horse overlapping the lower leg of the original gray horse. [IIIF multi-mode viewer]
Center right, white horse
Fig. cross-section-R939B Center right, added white horse in The Fall of Phaeton (layer 8: later restoration) Stage 3: blue sky and white horse (two layers); layer 7 (white): white lead; layer 6 (blue): white lead, ultramarine Stage 2: golden light (two layers); layer 5: white lead, yellow ochre; layer 4: white lead, lead-tin yellow Stage 1: gray smoke (two layers); layer 3: white lead, charcoal black, red and yellow ochre, red lake; layer 2: white lead, charcoal black, yellow ochre Ground: (yellow-tan), layer 1: siliceous earths, calcite (with traces of dolomite), yellow ochre, charcoal black [IIIF multi-mode viewer]
Peter Paul Rubens, The Fall of Phaeton (cross-section locations)
Fig. i Peter Paul Rubens, The Fall of Phaeton (cross-section locations), begun ca. 1604-1605, completed ca. 1610-1612 (Stage 3), oil on canvas, 98.4 x 131.2 cm. The National Gallery of Art, Washington, DC (photo: Greg Williams, mockup by E. Melanie Gifford) (artwork in the public domain) [IIIF multi-mode viewer]
Lower right, below Phaeton
Fig. cross-section-R1052 Lower right, below Phaeton in The Fall of Phaeton Stage 3: black clouds, layer 4: charcoal black, bone black Stage 1: gray, ruddy smoke with a streak of yellow light (two layers); layer 3 (yellow light): white lead, yellow ochre, some lead-tin yellow; layer 2 (smoke): white lead, charcoal black, vermilion, red lake Ground: (yellow-tan), layer 1: siliceous earths, calcite (with traces of dolomite), yellow ochre, charcoal black [IIIF multi-mode viewer]
Center left, beside Hora
Fig. cross-section-R1053 Center left, beside Hora, in The Fall of Phaeton (layer 6: later restoration) Stage 3 blue sky, layer 5: white lead, ultramarine Stage 2(?) thin, yellow-white streak of light, layer 4: white lead, lead-tin yellow Stage 1 black sky (two layers); layer 3: charcoal black, bone black, white lead, vermilion; layer 2: charcoal black, white lead, red lake Ground (yellow-tan), layer 1: siliceous earths, calcite (with traces of dolomite), yellow ochre, charcoal black   [IIIF multi-mode viewer]
Top edge, right, wash of golden light near lightning bolt
Fig. cross-section-R940 Top edge, right, wash of golden light near lightning bolt in The Fall of Phaeton Stage 2: yellow radiance, layer 3: white lead, lead-tin yellow Stage 1: gray sky, layer 2: white lead, charcoal black, vermilion Ground (yellow-tan), layer 1: siliceous earths, calcite (with traces of dolomite), yellow ochre, charcoal black [IIIF multi-mode viewer]
Top edge, left, clouds behind zodiac wheel
Fig. cross-section-R941 Top edge, left, clouds behind zodiac wheel in The Fall of Phaeton Stage 2 or 3: gray clouds, layer 3: white lead, charcoal black, traces of vermilion Stage 1: white clouds, layer 2: white lead, possible traces of ultramarine, lead-tin yellow Ground: (yellow-tan), layer 1: siliceous earths, calcite (with traces of dolomite), yellow ochre, charcoal black [IIIF multi-mode viewer]

Footnotes

Bibliography

Imprint

Review: Peer Review (Double Blind)
DOI: n/a
License:
Creative Commons License
This work is licensed under a Creative Commons Attribution-NonCommercial 4.0 International License.
Recommended Citation:
E. Melanie Gifford, "Exploration and Resources," Journal of Historians of Netherlandish Art 11:2 (Summer 2019)